

Homemade Cereal: A Nutritious Journey
Introduction
Are you tired of store-bought cereals that are packed with sugar and additives? Have you ever thought about making your own homemade cereal? If so, you’re in for a treat! Creating your own cereal blend is not only a fun and creative process, but it also allows you to control the ingredients and customize the flavour to your liking. In this article, we’ll explore the benefits of making your own cereal, suggest a variety of ingredients to use, and provide a basic recipe and tips for creating your perfect cereal blend. Let’s get started!
Benefits of Making Your Own Cereal
Health Benefits: One of the most significant benefits of making your own cereal is that you can control the ingredients you use. This means you can avoid excessive amounts of sugar, artificial flavours, and preservatives often found in store-bought options. You can also create a nutritionally balanced blend that meets your specific dietary needs and preferences.
Cost Savings: Making your own cereal can be more cost-effective than buying premade options, especially when you purchase ingredients in bulk. Plus, you’ll avoid paying for packaging and marketing, which often contributes to the high cost of commercial cereals.
Environmental Impact: By making your own cereal, you can help reduce waste by buying ingredients in bulk and using reusable containers for storage. This helps reduce the number of single-use plastic bags and boxes that end up in landfills.
Customization: When you make your own cereal, you can customize the flavour, texture, and nutritional profile to your liking. This allows you to experiment with various ingredients, making your morning breakfast routine more exciting and enjoyable.
Ingredients for Homemade Cereal
Grains: The base of any cereal is the grain. Common choices include rolled oats, puffed rice, and whole wheat flakes. You can also experiment with less common grains like quinoa, barley, or spelt flakes.

Nuts and Seeds: Nuts and seeds add healthy fats, protein, and crunch to your cereal. Some great options include almonds, walnuts, pecans, cashews, sunflower seeds, pumpkin seeds, chia seeds, and flaxseeds.

Sweeteners: While you can certainly create an unsweetened cereal, most people enjoy a touch of sweetness in their morning bowl. Natural sweeteners like honey, maple syrup, or agave nectar can be used in moderation. You can also use dried fruits like raisins, dates or apricots for a naturally sweet and chewy addition.

Flavourings and Spices: To enhance the taste of your homemade cereal, you can add various flavourings and spices. Cinnamon, nutmeg, ginger, and vanilla extract are popular choices that can help elevate your cereal’s flavour profile. You can also experiment with unique combinations, such as cocoa powder for a chocolatey twist or orange zest for a burst of citrus.

Creating Your Perfect Cereal Blend
Basic Recipe: Easy Homemade Cereal
To get started, here’s a basic homemade cereal recipe that you can customize to your liking:
- Choose your base grain (e.g., 2 cups rolled oats).

- Add your desired nuts and seeds (e.g., 1 cup chopped almonds and ½ cup sunflower seeds).

- Mix in your choice of sweetener (e.g., 2 tablespoons honey).

- Add your preferred flavourings and spices (e.g., 1 teaspoon cinnamon and 1 teaspoon vanilla extract).

- Combine all ingredients in a large mixing bowl and stir well.

- Spread the mixture evenly on a baking sheet lined with parchment paper.

- Bake at 325°F (160°C) for 20-25 minutes, stirring occasionally, until golden brown and crispy.

- Allow the cereal to cool completely before adding any dried fruits if desired.
Related: Homemade Chex Cereal Recipes: Creative and Delicious Ideas
Homemade Cookie Crisp Cereal
Ingredients:
- 1 cup all-purpose flour
- 1/2 cup butter, softened
- 1/2 cup brown sugar
- 1/4 cup granulated sugar
- 1 egg
- 1 teaspoon vanilla extract
- 1/2 teaspoon baking soda
- 1/4 teaspoon salt
- 1 cup mini chocolate chips
- 3 cups Cookie Crisp cereal

Instructions:
- Preheat your oven to 350°F (175°C).
- In a large mixing bowl, cream together the butter, brown sugar, and granulated sugar until light and fluffy.
- Beat in the egg and vanilla extract.
- In a separate mixing bowl, whisk together the flour, baking soda, and salt.
- Gradually add the dry ingredients to the wet ingredients, mixing until a dough forms.
- Stir in the mini chocolate chips.
- Roll the dough into small balls, about the size of a quarter.
- Place the Cookie Crisp cereal into a large mixing bowl and add the dough balls.
- Gently stir until the dough balls are evenly distributed among the cereal.
- Spread the mixture out on a baking sheet lined with parchment paper.
- Bake for 10-12 minutes, or until the cereal and dough balls are lightly golden brown.
- Allow the cereal to cool on the baking sheet for 5-10 minutes before serving.
This home-made Cookie Crisp cereal is a delicious treat that combines the flavors of chocolate chip cookies with the crunch of cereal. Store any leftovers in an airtight container at room temperature for up to 1 week.
Related: Leftover Cereal Muffins Recipe: An Ingenious Way to Use Up Your Cereal Stash
Homemade Chocolate Cereal

Ingredients:
- 2 cups all-purpose flour
- 1 cup cocoa powder
- 1/2 cup sugar
- 1/4 cup vegetable oil
- 1/4 cup milk
- 1 teaspoon vanilla extract
- 1/2 teaspoon baking powder
- 1/2 teaspoon baking soda
- 1/4 teaspoon salt
- 1 egg
Instructions:
- Preheat your oven to 350°F (175°C).
- In a large mixing bowl, whisk together the flour, cocoa powder, sugar, baking powder, baking soda, and salt.
- In a separate mixing bowl, whisk together the vegetable oil, milk, vanilla extract, and egg until well combined.
- Pour the wet ingredients into the dry ingredients and stir until a dough forms.
- Divide the dough into two equal parts.
- Roll out one part of the dough on a floured surface until it’s about 1/4 inch thick.
- Use a knife or cookie cutter to cut the dough into desired shapes.
- Repeat steps 6-7 with the other half of the dough.
- Place the shapes on a baking sheet lined with parchment paper and bake for 15-20 minutes, or until crispy.
- Once the cereal is done, remove it from the oven and let it cool completely on the baking sheet.
- Store the cereal in an airtight container at room temperature for up to 1 week.
This home-made chocolate cereal is a great alternative to store-bought varieties, as it’s free from artificial flavors and preservatives.
Related: 15 Easy and Delicious Cereal Recipes to Start Your Day
Homemade Baby Rice Cereal

Ingredients:
- 1/2 cup white rice
- 2 cups water or breast milk/formula
Instructions:
- Rinse the rice thoroughly with water.
- Spread the rice out on a baking sheet and allow it to air dry for a few hours or overnight.
- Preheat your oven to 350°F (175°C).
- Spread the dried rice out on a baking sheet and bake for 10-15 minutes, or until the rice is lightly golden brown.
- Allow the rice to cool completely.
- Use a food processor or blender to grind the rice into a fine powder.
- Bring the water or breast milk/formula to a boil in a small saucepan.
- Add 1/4 cup of the rice powder to the boiling liquid and whisk continuously to prevent lumps from forming.
- Reduce the heat to low and simmer for 10-15 minutes, whisking occasionally, until the mixture has thickened to the desired consistency.
- Remove the saucepan from the heat and allow the cereal to cool to room temperature before serving.
This home-made baby rice cereal is a healthy and affordable alternative to store-bought options. It is free from additives and preservatives, and can be customized to your baby’s taste preferences by using different liquids (such as breast milk or formula) to cook the cereal. Store any leftover cereal in an airtight container in the refrigerator for up to 3 days.
Related: Crunchy Yogurt Cereal Bars Recipe – A Healthy and Delicious Snack
Homemade Oatmeal Cereal
Ingredients:
- 1 cup rolled oats
- 2 cups water or milk
- 1/4 tsp salt (optional)
Instructions:
- Combine the oats, water or milk, and salt (if using) in a medium saucepan.
- Bring the mixture to a boil over medium-high heat, stirring frequently.
- Reduce the heat to low and simmer for 5-10 minutes, stirring occasionally, until the oatmeal is thick and creamy.
- Remove the oatmeal from the heat and allow it to cool for a few minutes before serving.
This home-made oatmeal cereal is a nutritious and customizable breakfast option. You can add sweeteners (such as honey, maple syrup, or brown sugar), spices (such as cinnamon or nutmeg), or toppings (such as fresh fruit, nuts, or seeds) to suit your taste preferences. You can also make a large batch of oatmeal and store any leftovers in the refrigerator for up to 3-4 days. Simply reheat the oatmeal in the microwave or on the stovetop with a splash of milk or water before serving.
Tips for Creating a Balanced Blend
- Aim for a mix of textures: Combine different grains, nuts, seeds, and dried fruits to create a satisfying crunch and chewy experience.
- Adjust sweetness to your preference: Start with a small amount of sweetener and add more if needed. Remember, you can always add fresh fruit to your bowl for additional natural sweetness.
- Experiment with flavours: Don’t be afraid to try new spices, extracts, and flavour combinations. This is your chance to create a cereal that’s truly unique to you!
- Keep nutrition in mind: Balance your cereal blend with a mix of protein, healthy fats, and complex carbohydrates to keep you full and energized throughout the morning.
Storing Your Home-made Cereal
Shelf Life: Your homemade cereal should last for about 1-2 months when stored properly. However, it’s important to note that the freshness and shelf life can vary depending on the ingredients used.
Storage Tips
- Store your home-made cereal in an airtight container, preferably made of glass or BPA-free plastic.
- Keep the container in a cool, dry place away from direct sunlight and heat.
- To maintain freshness, ensure that the container is sealed tightly after each use.
Conclusion
Making your own home-made cereal is a fun, rewarding, and delicious way to start your day. With endless ingredient options and the ability to control the nutritional content, there’s no reason not to give it a try. Happy breakfast-making!
Explore:
- Spiritual Uplifting Good Morning Quotes: Energize Your Soul and Fuel Your Day with Positivity!
- 6 Inspiring Change in Life Quotes for a Fresh Outlook
Frequently Asked Questions
Can I make home-made cereal without baking it?
Yes, you can create a no-bake cereal by simply combining your desired ingredients in a bowl. However, baking the cereal can help create a crunchier texture and enhance the flavours.
Is home-made cereal suitable for gluten-free diets?
Yes, as long as you use gluten-free grains like rolled oats, quinoa flakes, or buckwheat groats. Be sure to also check the labels of any additional ingredients to ensure they are gluten-free.
What’s the right way to make cereal?
To make cereal, first choose a type that meets your nutritional needs and tastes good. Measure out the appropriate serving size and pour milk over the cereal, along with any desired toppings such as fruit, nuts, or honey. Enjoy your cereal and chew each bite thoroughly. Additional tips include using a shallow bowl, selecting a cereal high in fiber and protein, and being mindful of added sugars.
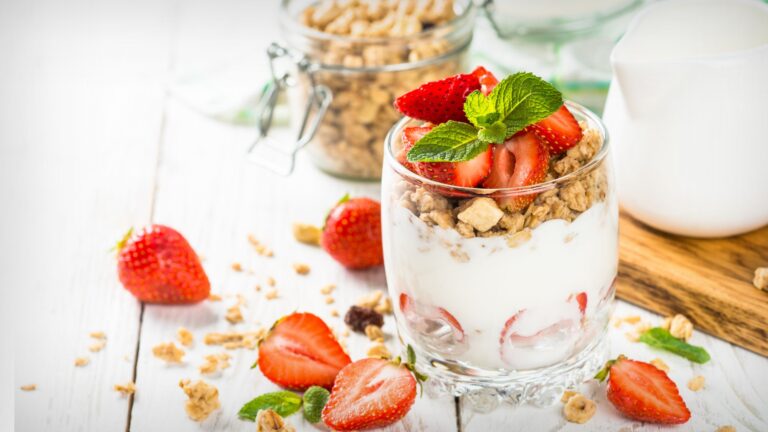
Can I add fresh fruit to my homemade cereal?
Absolutely! Fresh fruit like berries, banana slices, or apple chunks can be a delicious and nutritious addition to your cereal. However, add fresh fruit just before serving, as it may spoil quickly and affect the cereal’s shelf life.
How can I make homemade cereal more protein-rich?
To increase the protein content of your homemade cereal, consider adding nuts, seeds, or even protein powder. You can also serve your cereal with Greek yoghurt or a milk alternative like soy or almond milk, which typically contains more protein than regular cow’s milk.
Can I make a homemade cereal that is safe for people with nut allergies?
Yes, you can create a nut-free homemade cereal by omitting nuts and using alternative ingredients such as seeds (e.g., sunflower seeds, pumpkin seeds, or chia seeds) for added texture and nutrition. Just be sure to check the labels of other ingredients for possible cross-contamination with nuts.


Wow, fantastic blog structure! How lengthy have you ever been blogging for?
you made blogging look easy. The total look of your website is fantastic, as smartly as
the content! You can see similar: ecommerce and here dobry sklep